Evernote Tip: Create a Table of Contents in Evernote
I am constantly discovering new features in Evernote. My favourite recent discovery is Evernote’s Table of Contents feature. Creating a table of contents note is a fantastic way to organize all the information I’m saving.
Evernote is a huge part of my workflow for organizing research, e-mails, and other details for a web design project. I create a notebook for each project and save web pages, PDFs, important e-mails, and more. I love being able to access all of this information from my computer, iPhone, iPad or whatever device I’m using. (Check out my post Why I Love Evernote to learn more about the capabilities of Evernote)
How to Create a Table of Contents in Evernote
1) Find all the notes you want to be listed in your Table of Contents.
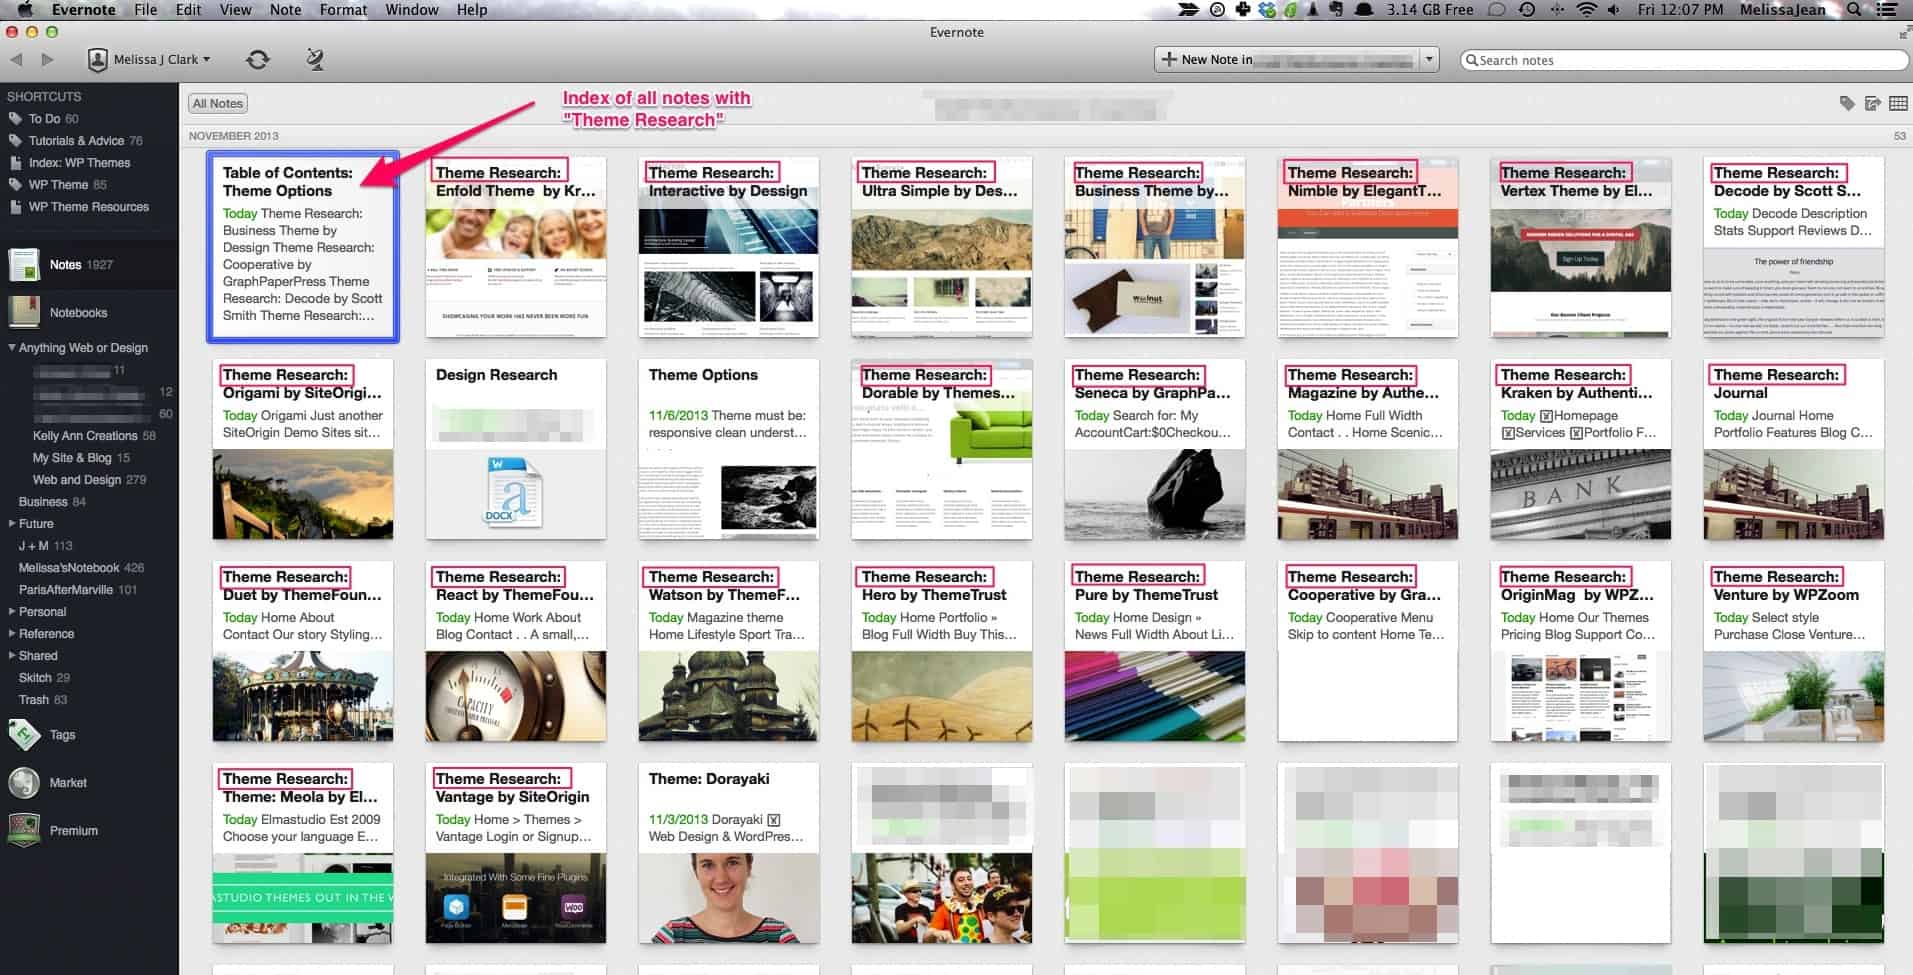
A great way to do this is by doing a search. For my example, I searched for ‘Theme Research’.
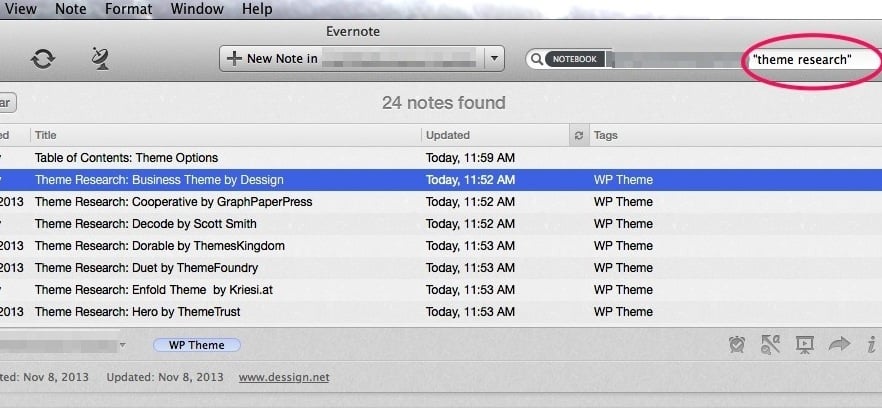
2) Select all those notes you found!
If you’re in a different view such as Expanded Card View, things might look a bit different. If things look different than my example, just right-click on a bunch of selected notes and the Table of Contents option should be there.
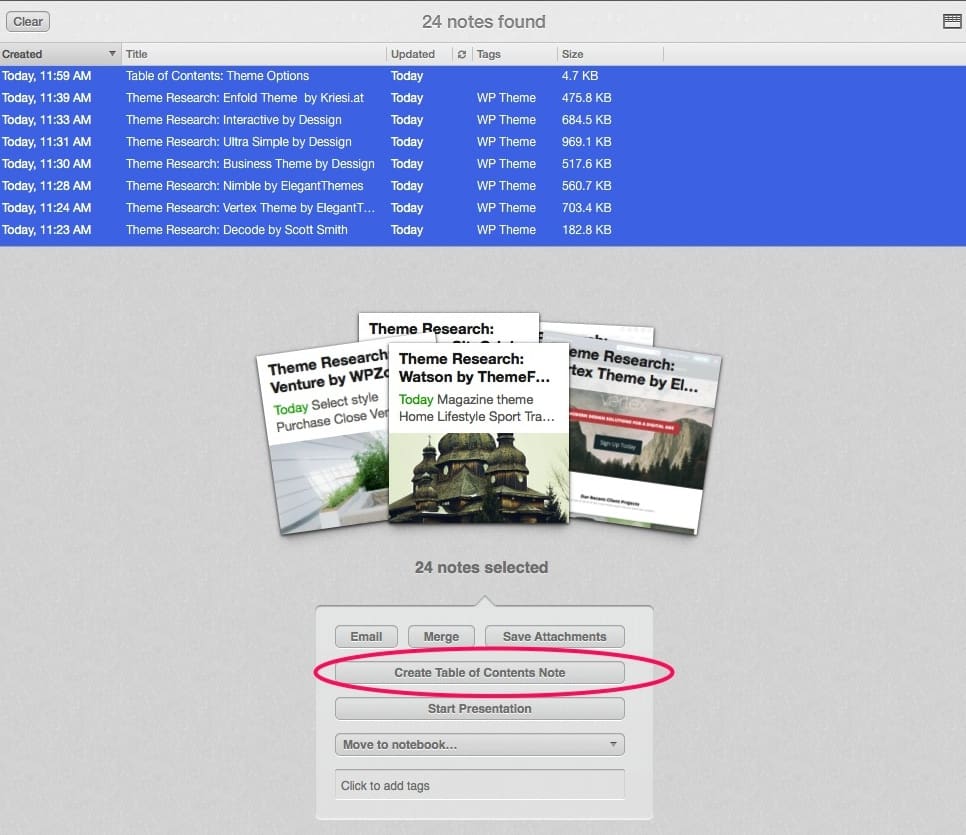
3) Click ‘Create Table of Contents Note’
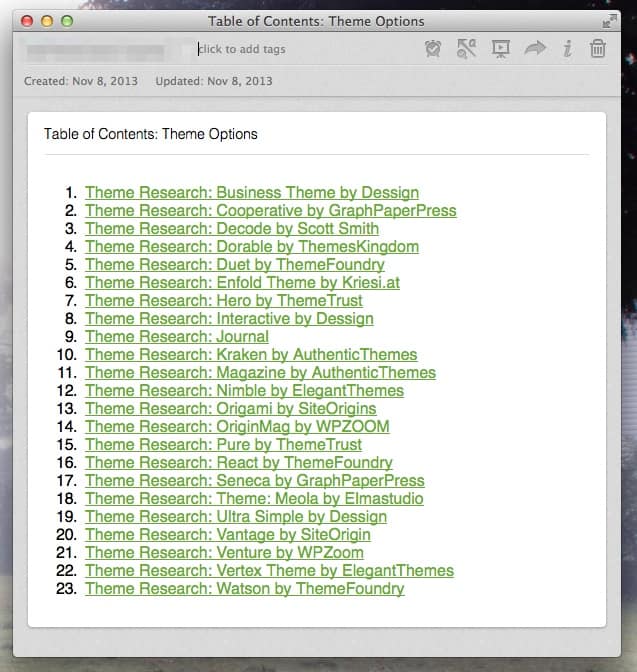
Evernote will create this handy listing of your notes. Each title is a link to the note within your Evernote library.
This is really great for organizing notes on a similiar topic, research, or sharing contents of your notes with others. I have a Table of Contents note set up for my tag WP Theme. It’s a nice index of all the WordPress Themes I’ve saved.
Pingback: How I use Evernote to Organize Client Projects